Interview: Bianca De Jager
2018-10-17
Base Two
2018-11-01Hi there,
Welcome to Drawing From Observation. Let’s start with introductions. I am Morné, and my name is Jason and we’ll be your guides throughout this journey of drawing classes. But right now you might be asking yourself, who are we and what qualifies us to be your teachers?
Well, here’s a brief background on who we are, and what we do, and then you can decide for yourself...
We have some experience in drawing.
Morné finished his honours degree in Information Design at the University of Pretoria in South Africa, he’s worked as a lead animator at various designs agencies, freelanced for a while, he’s also lectured at the Design School of Southern Africa, and for more than 5 years he’s been running his own design and digital marketing agency.
Jason studied Graphic Design at Vega Design School, he has worked as a conceptual and graphic designer at various agencies in Johannesburg and we’ve both been doing fine art and illustration for most of our lives. Even though we specialise in different avenues of the creative industry today, drawing and illustration still make up an integral part of our everyday lives.
Getting Started:
Everything You Need
DFO Presents
40 min Estimated Beginners
The basics of getting started.
Base One tutorials are geared at beginners and introduces you to the basics of getting started. Becoming a master illustrator begins with coming to grips with the tools of the trade.
A lot of drawing and learning how to draw comes down to personal preference
–the basics of drawing is as simple as pencil on paper, but it can become a whole lot more intricate the deeper you delve into it.
In this video we’ll take a look at the basic toolkit of an illustrator, and what Jason and I have each got in our drawing bags.
We’ll show you what we have on hand on a day to day basis, then a bit more of a technical deep-dive into pencils, pens, colour, and paper types.
If you’re just starting out with drawing
you might not know what the letters and numbers on pencils mean. Basically common pencil grades and what they mean.
B is for blackness and the lead is a softer.
H is for hardness and the lead gives a lighter effect.
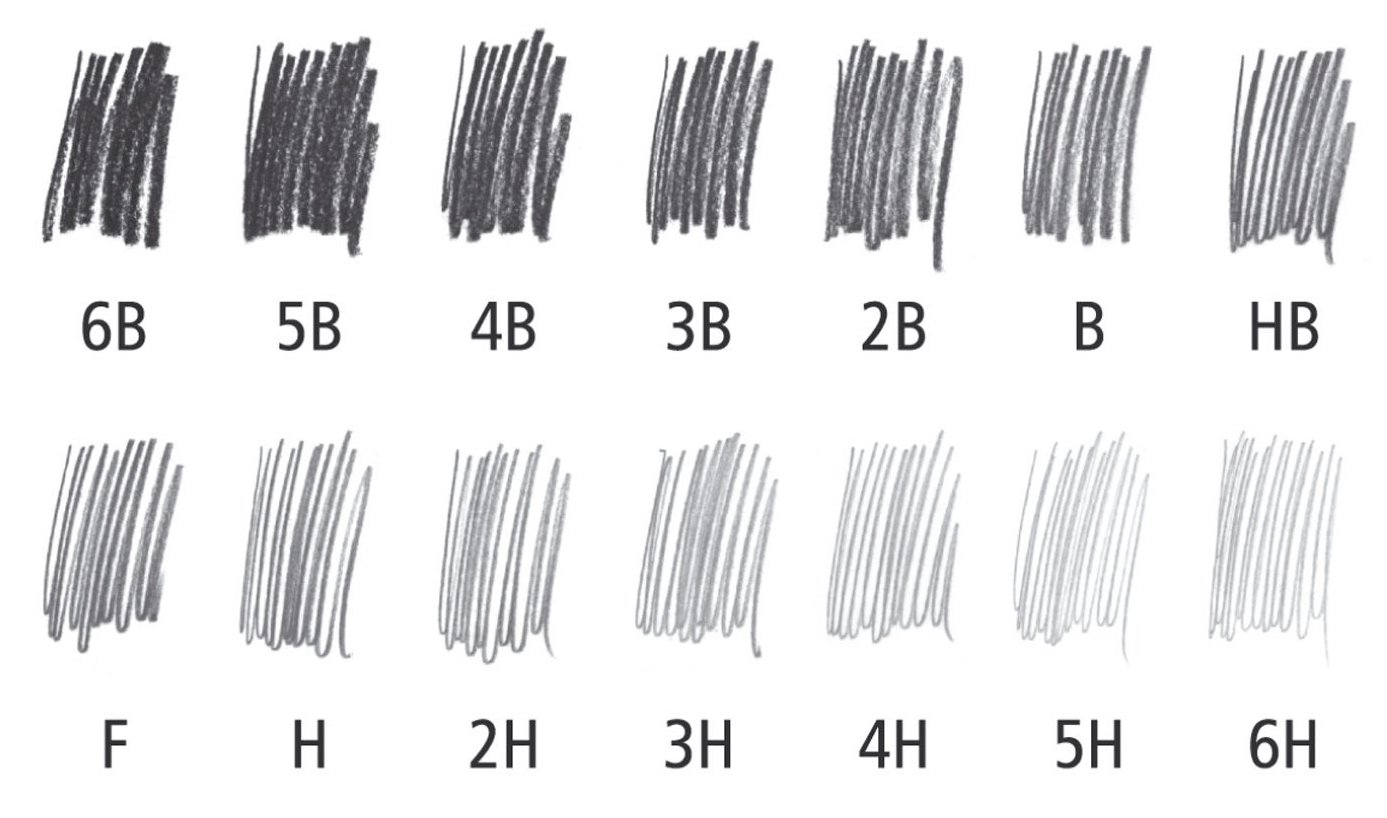
The number that comes in front of the letter tells you how much blackness/softness or hardness/lightness, e.g. 4B is darker than 2B. An HB pencil is a combination of hardness and blackness, and is commonly used for general drawing.
When you’re just starting out, you might not need a full set of pencils since applying a bit of extra pressure to a 2B can give you a 4B effect, and so on.
The most important thing is to understand what you’re working with. That way you’ll get the most out of your tools and the results will show in your drawings.
When it comes to pens and choosing what pen to use. Again it all comes down to personal preference. What have you there got in your pencil bag Morné?
I’ve got the bare essentials in my bag, things I think every illustrator needs:
- A black ball point pen.
- A Mechanical pencil, personally I think this little baby is a whole lot more useful than a normal pencil, because I never need a sharpener, and it comes with its own eraser in the back.
- My personal favourite, a black liquid gel pen - I do most of my drawings and illustrations with this one, because I love the texture and marks that it makes.
- I carry a spare one, if the other gets dry. This one has a 0,7mm point – so a bit thicker but still gets the job done.
- An eraser,
- A sharpener for any other odds and ends that I have in there.
What about you Jason?
- A 2B and a B pencil - I find they work best for my kind of style of drawing.
- I’ve got a normal ball point pen, just for notes and quick sketches and ideas.
- I’ve got a standard eraser, for any small changes
- But my favourites are my collection of fine liners; they offer a lot of intricate details in your drawings and are always handy in any situation. (The rest pretty much collects dust until it’s needed.)
Fineliners are a common art tool and we can analyse the four main characteristics – smoothness, bleed, ghosting, and smudge – to determine which one works the best for you.
Smoothness refers to how shaky the lines are and makes a huge impact on the ease of drawing. The bleed test looks at how easily the ink bleeds through the page. Very wet liners can rip up pieces of your page, so you want to aim for minimal bleed for an optimal drawing experience.
Ghosting happens when what you’ve drawn shows up on the other side of your page. It’s not exactly the same as bleeding and also depends on the type of paper you’re using, but it’s still something to look out for.
Smudge and feathering occurs when you immediately run your finger over a drawn line. The best markers will have minimal smudge so your work is preserved as your hand moves over the page.
The best pen might not be the most expensive one. Although choice comes down to personal preference…

The different kinds of inks:
What are the different kinds of ink? Why is it important? What are the correct tools of the trade with which you should (or shouldn’t) draw.
It’s important to know the different characteristics of the inks you use in order to get the best results.
Some inks dry to a shiny gloss, others to a matte; some inks are high in carbon pigment and therefore are really dark, while others can be only 95% black for instance. If all else fails - Read the labels!
But also don’t take the labels for granted. It’s best to always test your ink before use.
An ink might be waterproof on one type of paper, but non-waterproof on another. It’s better to find this out sooner rather than later. India ink – so called because the carbon pigment used to colour it is found in India – contains soot, binder, water, and other chemicals to make it liquid.
These inks are ideal for drawing comics, calligraphy, or any other time you might need your ink to be as black as possible. India ink is suitable for use with dip pens, calligraphy pens, and brushes.
A good tip to remember, is that if you’re going to be dipping your brush or pen, look for ink bottles with bigger openings so it’s easier to get into them. Although some India inks claim to be suited for fountain pens.
Usually it’s best to steer clear because the carbon pigment – no matter how miniscule – could end up damaging your pen.
If you do use inks with nanoparticles of carbon pigment, take care to wash your fountain pen regularly to avoid clogging. A good fountain pen rule is to go for inks that are made of dyes instead of carbon pigment. Each and every type of ink has its own personality.
Experiment with different inks to understand depth and drying time to ensure you understand your materials well before using them.
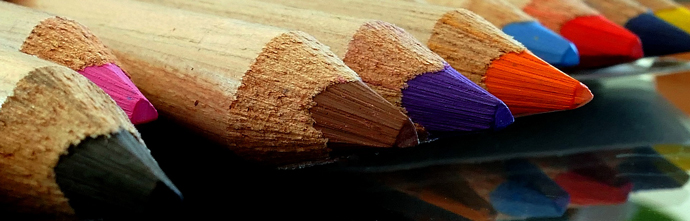
What is your personal process behind choosing colour palettes, inventory, storage, and sharpening techniques?
It’s a good idea to group your collections according to what they’re most commonly used for or what you’re going to draw, like Nature, Still Life, Portraits or even if you are doodling.
What are your choices for light tones, mid tones, and darker shading in each of these categories?
Before I begin a project, I usually pick out the dominant colours as my primary palette and this streamlines the process from the get go. When starting out, it’s most economical to buy a box of colours to get set up.
However, you’ll soon find you use certain colours more than others. Instead of replacing the entire box, it’s better to only replace the colours you need.
How to Sharpen Pencils:
When it comes to sharpening, you’ll want to reduce breakage. For this demonstration we’ll show you how to properly sharpen your drawing tools.
Standard Steel Pencil Sharpener:
1) Firstly hold your pencils in one hand 2) Point the tip away from your body 3) Insert the pencil into the steel pencil sharpener 4) Use slow and steady strokes and rotate the pencil clockwise to sharpen the tip.
The Sharpening Blade:
1) Remove the blade from the cover. 2) Hold the pencil away from you 3) Cut away at the wood to reveal the pencil lead. 4) Careful not to cut yourself.
The invention of paper and printing
Chinese writing is the oldest continuously used writing system in history, so it stands to reason that the invention of paper and printing would come from this nation.
After all, who wouldn’t tire from chiseling stone or carving characters into shell and bone?
Paper came about entirely by accident after combining certain materials for a totally different purpose. The surprising invention in the 6th century was used for wrapping things and even toilet paper before it occurred to anyone to write on it. Printing was the answer to the grand amount of Chinese characters, making it easier to convey messages than by writing.
However, the evolution of printing really took off once it moved west with Guttenberg and his printing press. And the rest, as they say, is history.
The right type of pencil or pen
Having the right type of pencil or pen is only half the battle won in drawing. Your final result depends as much on the type of paper you use as well.
Morné, what kinds of drawing books do you usually prefer to work with?
Let me start with this book, this is my current sketch and writing book. It’s a mole skin leather bound A5 book, slightly off-white, so it adds a bit of contrast with the start, it’s easy to carry around and pull out whenever I need to. Secondly, this hard cover book – it’s a bit more expensive, but I think every illustrator needs a book that they can show off and be proud of.
Obviously you can see there are a lot of loose papers in it, because that’s what drawing is all about, you just need a pencil and a paper. This next one is an older drawing journal, ring bound, which makes it easier to draw on both sides of the book, white A5, pretty standard stuff. Finally I’ve got this canvas pad, 100%, 300 GSM, it’s really great for pen and ink artworks and experimenting. And you, Jason?
I’ve got two books here with me, the first one is a hard cover book, it’s roughly 120 gsm, which means it’s fairly light, but slightly thicker than your average printing paper. The second book I’ve got here, is a soft cover book, the paper is a bit thicker, more or less 230gsm. It’s always important to consider the paper the weight, and the texture when you’re starting out or choosing the paper you’re going to work on because it all plays a role in how your drawings will turn out.
Firstly, smooth surface paper is the most common type and works well as an all-purpose paper. It’s good for graphite drawings and colour pencil portraits.
However, since there is absolutely no texture to this paper, it’s not recommended for charcoal or solvent on colour because it simply won’t blend. Toned paper is great for managing highlights, mid-tones, and dark shadows.
Commonly used for cartoons or sketching, this paper really makes your work pop. It’s really thin though, so not ideal for solvent blending. Mixed media paper in toned grey is a lot thicker and better for fully finished drawings than simple sketches.
If you’re using colour pencils with solvent, then hot press water colour paper is your best bet. It’s specifically made to work well with a wet medium and is also great for charcoal drawings. Hot press means it’s really smooth, so for more texture you should opt for cold press.
In conclusion:
So, that’s it for this video on the basics of getting started. We hope you’ve learned something new and that the true way to really figure out all of this is by playing around and getting used it by doing it yourself. Remember to take this time to practice and really get into it. That’s it from our side, we’ll catch you in the next video.
Class 3:
Gripping your Drawing Tool
The Magic Arm
20 min Estimation Beginners
In this video we will explain the concept of “gripping your drawing tool.”
For the exercises in this video you will need:
- Pencil
- Sharpener
- Sharpening Blade.
Controlling the pencil with our wrist.
In school we were taught how to write by controlling the pencil with our wrist. Because of this, our muscle memory defaults to this area when drawing. Not there’s anything wrong with drawing from the wrist – it’s great for small strokes and detail.
In this video we will explains the benefits of drawing from your shoulder, and how controlling your pencil and grip will greatly improve your drawing. The shoulder is good for going small as well as big, and allows so much more fluidity because of the greater range of motion you achieve.
The Tripod Grip uses your thumb, index, and middle finger to hold your pencil, like when you’re writing. It puts all of the control in your wrist and fingers, which is great when you’re using the tip of your pencil for small strokes and fine details. For small gestures and precision, this is a comfortable grip with good control. However, this grip doesn’t give you the range to comfortably use the sides of the pencil for thicker lines or shading.
Overhand Grips:This is when you place your hand over the pencil, with a relaxed hand and fingers and thumb in a light grip. The pencil already feels less rigid and your motion opens up a lot more.
You can now easily use the side of your pencil to create thick or thin lines, or transition between thickness and softness alone one curved line, varying your softness and tone as you go. All in one fluid motion. This grip is great for gesture drawing.
A gesture drawing is basically the start of an image, where we can create some guidelines in terms of action, form and pose of our model or figure. Focus on getting the idea down of what your about to draw.
Using the overhand grip, we can quickly get an idea of what our pose will be and what motions the figure might be doing. This is a great exercise for practicing and getting used to using the overhand grip and applying the larger strokes of tone, softness and line quality.
By changing the angle of your pencil you can control the line weight – keeping the pencil perpendicular to the paper gives you a thick line, tilting away from the paper gives you a thin, sharper line. All this can be achieved in one stroke to give you a line that transitions between weight for added dynamics in your drawing.
Finally, you can switch back to the tripod grip to add the fine details to the face of your figure. That’ll really give you an idea of how you can use these two drawing grips with one another.
Using the Overhand Grip:With a greater range of motion in the Overhand Grip, you are able to create with ease. This grip allows larger strokes of tone, soft gradations, and you can control the thickness and edge quality of your lines by rolling or tilting your pencil back or forward.
By changing the angle of your pencil you can control the line weight – perpendicular to the paper gives you a thick line, tilting away from the paper gives you a thinner line. And all this can be achieved in one stroke to give you a line that transitions between weight for added dynamics in your drawing.
The Tripod Grip provides an intuitive range of motion to your drawing style because of muscle memory established as a young child learning to hold a pencil and write for the first time. This movement is ideal for small strokes, details, and if you’re going at a slow, deliberate pace.
Your motion is limited, but it feels comfortable when you’re using it for the above purposes when you want your level of control to be super focused and precise. Intuitive drawing using the Tripod Grip works best in cases when you are able to draw an entire picture over a small area, and when you require immense detail and precision.
It’s also great for finishing up a larger drawing, and you want to add details that can’t be achieved using the Overhand Grip.
Because of muscle memory making your wrist a default controller in drawing, you will need to engage your shoulder frequently in order to form new pathways in your brain. In this way, when you pick up a pencil to draw, your body will know to automatically engage your shoulder, not wrist.
Many hours of exercise are needed before this becomes a reflex that you don’t even think about.
Exercise 1 – Circles, Curves & Lines:- Begin by filling pages with circles, curves, and straight lines using the Overhand Grip.
- Sharpen your drawing tool with a Drawing Blade, like explained in Class 2
- Don’t revert to Tripod Grip, the point of this exercise is to get used to holding the pen in a different way.
Draw two dots on either side of a page and connect them with a straight line to open up your movement and engage your shoulder in that wider range.
Draw an entire page or two to really get use to the new sensations in your shoulder.
Exercise 3 – Fluidity & Ghosting:- To practice fluidity, draw four dots and connect them with an ellipse.
- Try ‘Ghosting’ over the lines, by practicing the motion of an ellipse before touching the paper.
- Repeat this over and over until you’ve nailed it.
- This can be used as a warm-up exercise before you begin with your normal illustrations session.
- Master control over line weight by drawing curving lines that transition between thick and thin. You can also use this exercise to practice shading and tone by varying your pressure as you go.
- Draw a 10cm x 10cm square on our page.
- Fill the square with a solid grey on the downstrokes.
- This will help you get used to creating and exercising a clean, solid tone when drawing.
- Lift the pencil on the upstrokes and focus on keeping the distance between each stroke consistent and use the same amount of pressure each time.
- Use this exercise to practice shading and tone by varying the pressure as you draw.


